Showing posts with label kitchen. Show all posts

Sunday, 3 January 2016

Kitchen Floor

Tiling for the floor in the kitchen and scullery was going to be mightily expensive. I first decided on using popsicle sticks to make a wood floor - but had to change my mind when our local shops all seemed to have a distinct lack of wooden lolly sticks for sale. As I scrolled through pages and pages of early Victorian kitchen pictures, I noticed that a lot of them did have stone flooring - huge tiles laid quite roughly. I thought about what I had to hand... and turned once again to my trusty grey-board :)
I had some acrylic paints - and so watered them down and gave a grey wash to my grey-board ... but unfortunately used up all my white acrylic paint. Still, I persevered using black, dark blue and a little brown paint colours to mottle the A4 grey-board. After it had dried, I cut the board (it's like thick cardboard - about the same as two layers of cereal packet card) into 1" strips. These strips I Then cut further to make rectangles 1" by 2" - saving the leftover bits and throwing nothing away.
I bound up 20 or so 'tiles' at a time with elastic bands, and then sanded the edges so that they were about the same size - I didn't want to be too precise about it.
 I stacked up the tiles all ready to use...
I made a paper template of the rooms I wanted to lay the floor tiles into - just using cheap printer paper. I then had to decide how I wanted to lay out the tiles. At first, it was going to be staggered in straight lines... but that was just too easy - and a little boring too.
 The tiling was lapped over the edges of the paper - mainly using the off-cuts from when I made the strips of cardboard tiles. I glued the tiling to the paper using a good strong wood glue. When everything was in place, I piled a couple of books on top - followed by anything heavy I had to hand... left over Christmas booze bottles, laptop, spray cans of paint, etc...lol
 After a few hours, I uncovered the flooring sheet, turned it over, and cut away anything that was overlapping the edges of the template paper.
I then dry-fitted the flooring into the dolls house - making sure it was the right size, and that I had no significant gaps.
 All okay - so I then used my favourite product of all time... MODPODGE!
I brushed it on, then stippled over with a cheap brush - keeping tweezers handy to pick off the stray brush hairs that fell off.
 And there we have it! Kitchen and scullery floors all done - now onto the popsicle walls :)


Tuesday, 15 December 2015

Purple Orchid Cottage

Some of the items I made for the purple dolls house - a bread bin and spice rack, and paper flowers - pansies and snowdrops :)


Monday, 27 May 2013

Kitchen Scales

Looking at the small collection of mini-treasures I have collected for my 1:12 doll-house, I noticed something... not all the objects were really true-to-scale. My biggest bug-bear was the set of kitchen scales I had bought. I had hunted around to find them in plain black, and was so pleased when they arrived through the post. BUT... if they were real, they'd be over two foot long! I just wanted a little set of scales to look nice in my dolls kitchen. The other slight problem was that I had decided NOT to have the kitchen in pine with black and copper accents, but instead to have it all white and purple. So... here's a step-by-step guide to what I did;

Everything I used to construct the scales were things I already had – I bought nothing extra.

Firstly, for the top bowl, I took a metal pie dish (1:12 scale, obviously) and glued to the bottom of this a 10mm bead cap. I used super-glue, simply because I am always worried of things falling apart, so use whatever I have that I think will be strongest. These were left to dry overnight. I also used two 1:12th scale small paper plates glued together for the top part of the scales as an alternative.
For the next stage, other people may use a 1/2” cube of balsa wood – but I didn't have any. What I did have was 2mm grey-board (a thick cardboard used for crafting). This had a white paper covering on one side – but that's not essential to the project. I cut the cardboard into 1/2” strips, then cut these strips down to make 1/2” squares. I needed eight of these squares for the scales – but I always cut extra because I am terrible at cutting things straight, so may have need a few more :)
I glued the eight squares together, making sure that two of the sides were always perfectly lined up – well, as perfect as I could make my wobbly squares.
I then waited a good 15 minutes for the cubes to dry (leave for longer if not using a quick-drying glue). I then carefully cut a wedge from the front of the cube using a stanley-knife, and trimmed off any excess from around the rest of the cube to make it neat.
What was to become the top of the scales needed to be wide enough to fit the 10mm bead cap on... I've already made a couple that weren't quite big enough (maybe I should go and buy some smaller bead caps?)

Next, I sanded the faces of my scales so that the surfaces were all even and not too 'sharp'.
When I made my first set of scales, I cut a wedge shape out of the first piece of cardboard, glued on the following piece and then used the first piece as a guide the cut the wedge again... and did this with all eight pieces. This made the finished scales have much more defined edges, which I can't decide if I like better or not!
For the next part of the project, I cut a strip of thin paper just slightly over 1/2” wide, and wrapped this around the scales. Any bits of paper that were overlapping the edges, I chopped off with scissors. This covered the joins of the card to make the shape stronger... it also gave a smoother finish. I also made sure that the paper join or overlap was at the bottom of the scales.
Now, I am a VERY messy crafter – I have rheumatoid arthritis which means I can't really do fine detailed work... so my scales were looking pretty ropey by this stage. So... out came my favourite crafting item - ModPodge! I first painted it on the sides and the bottom of the scales, and left it to dry. After that I painted the rest of the scales. This was left to dry overnight so that it was quite hard. Then I sanded it down gently so that it looked smoother (but not a lot smoother, unfortunately!).
That's all the difficult bits over and done with!
Out with the paint (the colour I wanted the finished sales to be), and I painted the separate pieces – the underneath of the top bowl, the back of the 'dial' (or face - which is a blank brad about 1/2" in diameter), and the main body of the scale too. I waited for them to dry, and then begun assembly. I made a little hole on the front of the scale then cut down the 'legs' of the brad I used for the face, and gently eased the brad into the scale body. When I was sure it would fit properly, I removed it to apply glue so that it could be attached permanently.

Then I added the top bowl, glued it securely... and then out with the paint again! I finished the painting and let it dry.
Fitting the printed out face to the scale front was easy enough – I just had to make sure I glue it the right way up :) As I'm a bit of a ModPodge addict, I used a gloss version to give a final lacquer to the piece, doing the bowl first and the rest of the piece when the top had dried. One set of scales I finished, I roughed up the metal bits – scratching through the paint to make them look used and battered – I did this before adding the ModPodge.

For the face/dial, I was going to cover it with Glossy Accents... but had some little clear 'bubbles' I used instead. I added this when the scales were completely dried.
Hey, presto! a finished set of kitchen scales that actually fit my dolls house! So... they're not perfect – but I'm no artisan, just a crafter and a 'hobby-ist' :)

Variations:
I used a larger brad for the top of the scales, and have also added a fancy brad to make a base. I guess I could also make a square or round cardboard base? Maybe for another day :)

On the original scales (above), the 'face' is made from a punched circle of card with embroidery thread wrapped around it and painted (with my purple nail varnish). It was glued onto the base with a stack of very small punched circles.

Sunday, 26 May 2013

Everything's Purple!

The new project (1:12th scale cottage) is all purple...
I'm supposed to be shingling the roof right now, but after sticking on 4 tiles, I needed a break *lol*
Still, it gives me a chance to show some other bits and pieces...
I had a large display cabinet which a door had fallen off. It didn't really match anything else, and the varnishing was a bit rough, so I decided this would be my first 're-furb'.
I was quite rough, ripping the doors off. Some were 'hinged', whilst the middle doors were all glued into place. I decided that for the look I needed, I would leave the rough bits alone and just paint over them.
 I only had some leftover Humbrol enamel model paint and a tiddly brush... but better to use what I had, I thought, than go and buy new stuff.
I hated waiting for the paint to dry - I am so impatient with projects like this... I really have to learn to just leave alone and find something else to do :) I scouted the internet for purple gingham fabric... and eventually ended up scanning a piece that I had leftover. I didn't want a straight, precise design, but rather more of a 'squiffy' home-made feel. I used this paper I printed to cover the back of the unit, the shelves (including the little overhang) and the inlay on the doors.
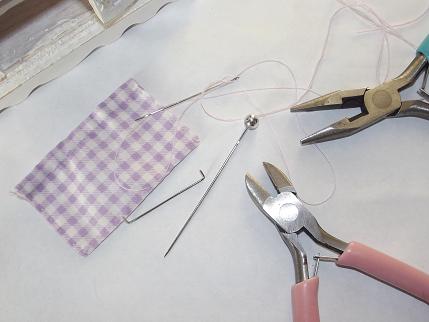
 Next I had to cover the gap I had left by ripping off the middle door. I just wanted to have a piece of fabric hanging there... and I used an offcut of the piece I had scanned :) To hang the little curtain, I found a long decorative pin, and cut it to the size I needed, plus a little extra to turn up about 1/8" each end.
 I 'borrowed' hubbys Dremel to drill the holes in the cabinet for the curtain rod to fit. It was a lot easier to turn the unit upside down to drill the holes :)
Of course, I couldn't glue the rod in until the curtains were placed on it. I sewed the gathers into the curtain permanently, and added another couple of stitches to make sure to curtain didn't billow out too much.
 Then I simply glued it into place... but it needed something else... a bit more...
 I 'dyed' some cheap leftover lace with shimmer mist sprays, and then glued some around the top, and sewed a bit across the curtain.
 Okay, so the curtain bit should have been sewn on BEFORE the curtain rod was glued into place - the lace is a bit bowed. But after 'hmming and ahhing' about whether to un-sew it and glue it in place instead, I thought that I quite liked it being wobbly :)
I found my purple wax, and so rubbed a generous amount into some rubbed-down edges. I frayed the edges of a few squared off-cuts of purple gingham material scraps, painted the endes of a rolling pin dark purple (nail polish! I had no paint), and added a few accessories. I was very happy with the result :)

Friday, 27 January 2012

My Perfect Kitchen?

Well, no... my miniature dolls house kitchen is something I'm quite pleased with, but by no means would it be my perfect kitchen. No washing machine, cupboard space or electric kettle :)
Still, as I said... it's almost complete and I'm quite chuffed with how it's turned out. All I really have to do is add a few touches and some curtains to the window...


I decided on having no coving in the kitchen, and only painted the walls in magnolia with some added texture. The tiles made a nice statement on the far wall... and most of my time was spent on the floor as far as decorating the room is concerned. I liked the paper effect of the flagstone flooring, but wanted something a bit more tactile. So I used ModPodge (satin) and when it was almost dry, I went around each flagstone with a cocktail stick.

Saturday, 7 January 2012

Dollhouse Kitchen

The kitchen is different to all the other rooms in the house, as it is painted over a paper base, and has no coving. I decided to tile the back wall, as this is where the range-oven will be. All the other furniture will probably be moved around... I have no idea exactly where anything is going yet :)