Showing posts with label handmade. Show all posts

Thursday, 11 February 2016

What A Klutz!

Today I decided it was about time to get my figures ready for putting together... I made them all shoulders, made sure they all had a matching pair of hands and feet with footwear (I hate sculpting shoes - feet are easy, but shoes are a pain! lol), and drilled holes ready for the armature...
And that's where it started to go wrong!
My drill is too tiny, so I borrowed hubby's Dremel to drill the holes I needed as it's bigger than mine. 
Firstly, I misjudged how powerful it was, and when drilling, the little arm flew out of my hand, and with the power of the Dremel behind it, shot across the room somewhere. Half an hour of searching, and I finally retrieved the appendage and started again - holding on a lot more tightly this time.
Next mishap... I was holding tightly to "Come Give Grandma A Kiss", when I felt a terrible burning sensation in my fingers... because I had drilled through the side of the arm, and the drill bit was whirring away, burning my hand! 
Darn - what a Klutz I was being today!
I got out some more clay, and added a bit to Grandma's arms... and was so heavy handed as I was trying to mold the clay, I broke off Grandma's thumb, little finger and ring finger! Out with the Liquid Sculpey, and on to trying to fix poor Grammy's hand. I had to do the two fingers first, and whilst that was in the over re-baking, I decided to clear up a little... and 'cleared up' her thumb. An HOUR later, I managed to relocate the missing thumb under my desk, and reattach it with Liquid Sculpey and baking again. The thumb moved. Somewhere between me placing the limb gently in the oven, and getting it out 10 minutes later, the thumb had turned... so now Grammy has severe arthritis in her left hand with her disjointed thumb.
What a palaver!


On the plus side... Grammy has a lovely little pair of lower legs with pink slippers...
Lets hope I can put her together without doing any more damage!

I have to add this... Hopefully Ms Lizzie will put a photograph of her Fred onto her blog soon.
She came for a visit on Sunday, sat down with a lump of clay, and made 'Fred' - her first figurine sculpture, and he is amazing! She's a natural :)
For myself... well, I have had such a lot of fun making Grammy, that I shall probably make a few more to sell - all different and unique - because I don't use molds :)

Thursday, 14 January 2016

Copper Boiler

I decided to make a copper-boiler for the scullery - this was basically a pot (not often copper, because it was too expensive - but wrought iron instead) set into a concrete top set on a brick surround, with a fire underneath to heat the water. The water was usually ladled in - and when not needed, ladled out again. This copper boiler was used, obviously, for hot water - but also to cook in (boil and steam), and clean items in (including laundry). There was an 'air space' under the fire grate to allow the heat to circulate, and it was covered with a barrel-top (a circle of wood slats).
In a dairy larder/scullery, the copper boiler was used to heat the milk in when making cheese. Just a little bit of useless information there :)
I started of my boiler with 3 pieces of cardboard and a cut-up egg carton...
I smooched a bit of Liquid Sculpey over the basic carcass when it was built and then cut out some rectangles from Fimo clay. I actually made these rectangles - the 'bricks' - too large, and if I did another, I'd make these bricks a lot smaller. The Liquid Sculpey allowed the bricks to stick to the cardboard. I rolled out a thinner piece to sit over the top and shaped it into the rim of the bowl.
I took a risk making a cardboard carcass, but thought that as Fimo baked at such a low temperature, the cardboard wouldn't have time to burn. The wood glue I used in some of the carcass-making did brown - the paper glue (Scotch Quick Dry) didn't discolour at all.
After baking, I let it cool and then painted it with acrylic paints. After talking to Ms Lizzie, it was decided that whitewashed bricks would be more suitable than red brick.
I daubed the paint on because I'd rather have this effect than try and make everything look absolutely smooth and perfect - because it never does look perfect! The 'insides' of the boiler look a total mess - but nobody will see those when the boiler is installed into the scullery.
I was going to use black paint for the bowl, but changed my mind and used copper - well, it's brass coloured actually, because I didn't have any copper paint.
A small door knob and a hook-and-eye simple latch, and it's all ready - except the copper paint is so thick it will probably take a week to dry lol I have made the wooden top also - but I think it needs... 'tweaking' - so I'll photograph that later.
 I am pleased with how it has turned out - it looks just as good as the bought ones that cost at least £40 - and mine was made up with stuff I already had - and some Fimo oven dry clay that possibly cost less than £3.50.
I will probably do a little more painting, and I have a battery operated red glow light (£3) that I can hide inside the fire grate :)
Okay, so it took me a day to build and make - but still not a bad addition to my dolls house scullery, I think :)


Sunday, 3 January 2016

Kitchen Floor

Tiling for the floor in the kitchen and scullery was going to be mightily expensive. I first decided on using popsicle sticks to make a wood floor - but had to change my mind when our local shops all seemed to have a distinct lack of wooden lolly sticks for sale. As I scrolled through pages and pages of early Victorian kitchen pictures, I noticed that a lot of them did have stone flooring - huge tiles laid quite roughly. I thought about what I had to hand... and turned once again to my trusty grey-board :)
I had some acrylic paints - and so watered them down and gave a grey wash to my grey-board ... but unfortunately used up all my white acrylic paint. Still, I persevered using black, dark blue and a little brown paint colours to mottle the A4 grey-board. After it had dried, I cut the board (it's like thick cardboard - about the same as two layers of cereal packet card) into 1" strips. These strips I Then cut further to make rectangles 1" by 2" - saving the leftover bits and throwing nothing away.
I bound up 20 or so 'tiles' at a time with elastic bands, and then sanded the edges so that they were about the same size - I didn't want to be too precise about it.
 I stacked up the tiles all ready to use...
I made a paper template of the rooms I wanted to lay the floor tiles into - just using cheap printer paper. I then had to decide how I wanted to lay out the tiles. At first, it was going to be staggered in straight lines... but that was just too easy - and a little boring too.
 The tiling was lapped over the edges of the paper - mainly using the off-cuts from when I made the strips of cardboard tiles. I glued the tiling to the paper using a good strong wood glue. When everything was in place, I piled a couple of books on top - followed by anything heavy I had to hand... left over Christmas booze bottles, laptop, spray cans of paint, etc...lol
 After a few hours, I uncovered the flooring sheet, turned it over, and cut away anything that was overlapping the edges of the template paper.
I then dry-fitted the flooring into the dolls house - making sure it was the right size, and that I had no significant gaps.
 All okay - so I then used my favourite product of all time... MODPODGE!
I brushed it on, then stippled over with a cheap brush - keeping tweezers handy to pick off the stray brush hairs that fell off.
 And there we have it! Kitchen and scullery floors all done - now onto the popsicle walls :)


The Alcove... Again

I thought I'd show how the alcove was going to be fitted - it's just dry-fitted until I decide on the decoration for the rest of the room. I am really happy with the fit - and it matches perfectly with the rest of the furniture I had made.
 
The reverse side - creating a false wall so that the study ('Woman In Black' room) can be made slightly larger, using the space under the stairs.
 The little table was a bargain - broken and in need of a bit of mending, it cost just £1. I dirtied it up, roughed it up... and now it's all ready for the decaying wedding cake I have to make.

I used a pearl alcohol ink on the fireplace - I wanted it to look 'cold'. I think I may 'marble' the hearth. I used black alcohol ink to 'paint' in the fireplace itself, then daubed it up the fireplace to look a bit used and sooted.

It's quite difficult to see, but here I have added the ceiling wallpaper - it's embossed which I thought was in keeping with the character of the room. I inked it - a lot! Adding a heavier layer of ink above the fireplace for sooting effects. Unfortunately, a crease appeared in the ceiling paper - but I don't think I mind too much :)
 
 The chair was also a £1 bargain. I sanded it, sprayed it.. and really dirtied up the upholstery to make it look decayed and mouldy. I accidentally dropped glue onto the back fabric whilst putting the chair back together - but that's okay because it just makes it messier is all :)

The frame was found at a local retailers - 3 for £1. I added ink and modpodge to blend it in... and the cat was a 49pence bargain - so cute!

Wednesday, 30 December 2015

The Alcove...

The little alcove shelf is finished. It was going to be an opening door that looked like a shelf of books, but I changed my mind :) I'm not sure what will be put into the arch at the top yet - the shelf is only about one centimetre in depth.

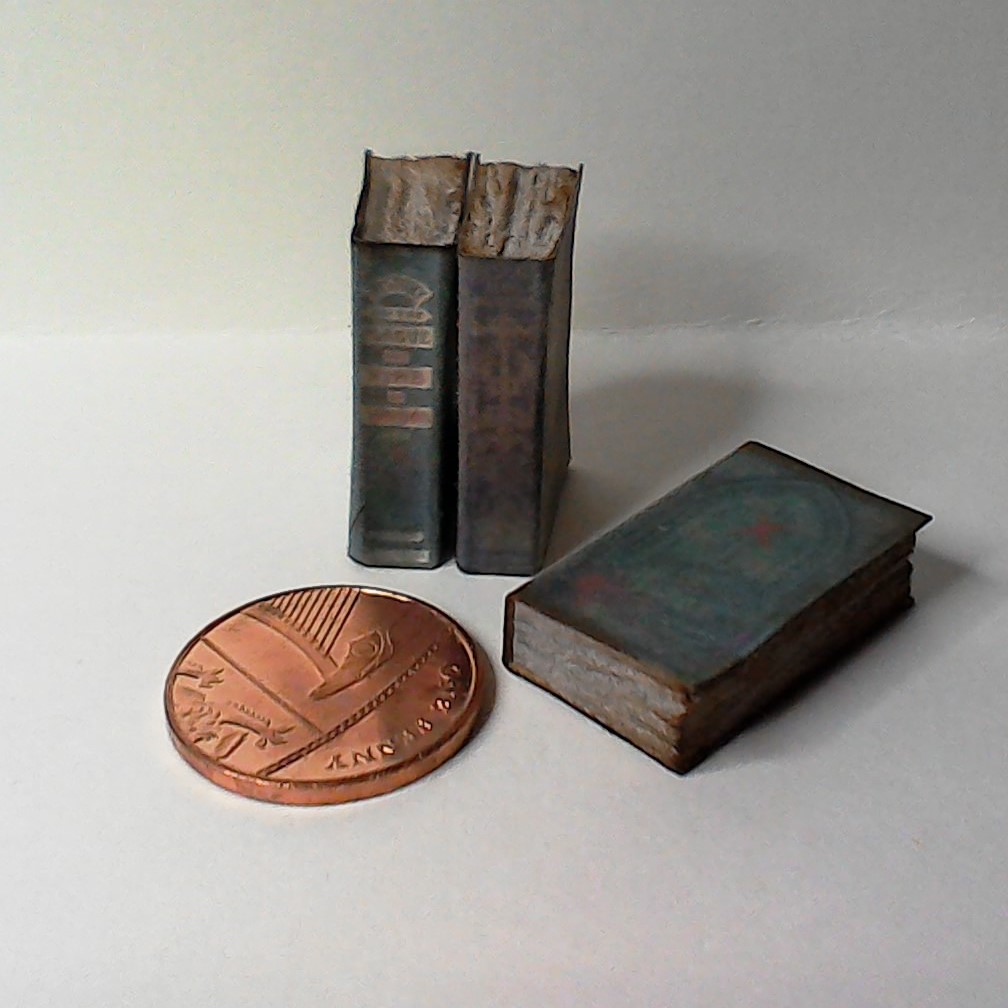
I filled the two middle shelves with books - they can't be opened, and I had to chop them in half to fit the depth of the shelves - but it's only for decoration so I hope it won't look odd or out of place :) There will be skirting covering the bottom, as well as architrave at the top, which is why there are gaps :) It's been crackled, inked, and sanded to match the other furniture I made.
Up close you can really see the over-use of ink lol... and although I do like the effect I have on the shelving, it was achieved by accident because I was too impatient to wait for the paint to fully dry.

After finishing, and not being able to do what I really wanted to do (print flooring and bake clay - I have no ink nor oven lol) I started to look around for something to add to the dolls house. I had printed out a lot of the book covers previously, and had used only a few, so decided to make a few more books - full 1:12th size this time :)
I'm really pleased with how using grey board turned out - it almost looks like real pages :)
I could have painted them white - but decided just to leave them with just a bit of ink to age the 'pages'.

Only another 100 or so more to do then :)

The Best Laid Plans...

There was I, after stripping the dolls house even more (yes, the roof is now fully off, and all things that needed to be chopped are chopped!) and wanting to print out the wallpaper and flooring designs I had managed to get a hold of (or design myself)... when the printer suddenly decided that now is a good time to warn me that it can only print in black, because there is no blue ink left. ARGH!
I am left to pick at doing little things - things I don't really need to do and things I shouldn't be trying in the first place... Like the faux faberge egg standing at 1/2" tall...
This was a practise run. Halfway through moulding the Fimo clay ready for baking, I realised that I don't actually have a working oven until Sunday. I got out my heat gun and blasted that poor wee ball of clay... and blistered it! Still - now I know what NOT to do lol. I just dotted a pearl design all over it and stood it on an upturned crown bead cap. Oh, and  teeny pin head for the top. The next attempt will be smaller and glazed (I hope) with a different pattern :)


Monday, 28 December 2015

Little Jugs

I made all the jugs in a white 'enamel' with navy blue trim - very traditional :) The set I made for my dear friend Lizzie looks more pristine and new - because hers will be a Victorian dolls house, and the jugs/ewers would have been newer back then. The ones I made for myself I wanted to be very dilapidated and rotten looking... so here they are (not a bad attempt for first try)
Lizzie's gift from me - new and pristine looking :)

I wanted my jugs to be grimier and very used looking

This is the only sizes I shall make - the tiny ones are so difficult with my old arthritic hands lol


Tuesday, 22 December 2015

Just Practising...

I have seen a lot of paper jugs and ewers on the internet, and decided to see if I could cobble one together. Just as a rough piece, I made some out of paper and didn't paint them - a practice run, if you like :)
I can't wait to get hold of some paint and make some 'properly' :)
The ruler shown is in centimetres.
 Excuse my terrible nails - but crafting is a messy job lol


Miss Havisham's Furniture #2

After being inspired with making the ladies bureau (still not glued together - awaiting bits to put inside), I decided to make a grandfather clock. It's finished - nothing opens up - but the pendulum swings (erratically - but still, it swings!). I did go over-board with the ageing ... but in fairness, it was the lacquer finish that bought out the darker colour and made it bleed somewhat. I do like the result though :)

I actually made plans on paper for the clock, which was lucky as I promised I'd make one for a dear friend too.  Second time around, it was easier to make, as I'd made the mistakes and errors with the first :)
The clocks are slightly shorter than bought 1:12th scale grandfather clocks - but the ceilings in my dolls house are actually quite low, I think - so perhaps a little shorter will be better for me.
Here's the clocks together:
Firstly, the bought one... then the one I have made for a friend, and lastly my own that I have made.
The one I made for a friend is under-coated and sanded, with all the bits she needs to finish off the clock in a little baggy. It's been left like this so she can paint it in the style she chooses - I can't wait to see what she does with it :) I think I'll print off a few faces for the clock - something a bit more suited to her decor. If needed, the hole where the face is can be left open, and a working watch-face inserted (it is a 1" circle).


Sunday, 20 December 2015

Miss Havisham's Furniture

Although I haven't started to decorate the new house yet, I have decided on the theme for 3 rooms - one will be the study from "The Woman In Black", another will be a scene from "A Christmas Carol" with (hopefully) the ghost of Jacob Marley... and the one I am currently making furniture for is a Miss Havisham room  from "Great Expectations".
I took a few lessons and inspiration from Kris at 1" Minis and have almost finished a ladies bureau - I haven't glued the front on yet, because I want to fill it up a bit more, and I also want to 'age' the drawer knobs too.
It was actually more difficult than I imagined it would be to make the piece look less 'shabby-chic' and have a more decayed look - but I think I have done quite alright for a beginner :)