Monday, 8 June 2020

Trying To Remember...

I have been 'miniaturing'... and I've done a fair bit - its the trying to remember how blogger works, and also trying to remember to update lol.  The cricut has been invaluable so far - furniture making is so much more easier :)
I am helping to run a small facebook group now - https://www.facebook.com/groups/WhereDoIBegin/
It's for both the newcomers to the miniature world, as well as the more seasoned mini crafters too - after all, there's no point in just having people who want to learn if there's nobody there to teach them :) If you're interested, come along and join us. We don't bite... well, not often anyways ;)
So... I will sort out the photos and post what I have been up to - though it may take a little while as I am in the middle of a 'craft-room crisis' at the moment. Too many hobbies and not enough space lol
My craft room is overflowing, stuffed to the ceiling, and I can barely see my floor :)
Of course, there's not actually much floor space to be seen anyway as I have so many storge towers and drawer units here too! 
BUT.., I will get it done. Really. Honest ;)

Tuesday, 25 February 2020

Look Who's Back!?!? And She Has A Cricut...

It has been many years since I posted here - age and illness robbed me of deft fingers and good eyesight. I am in my 50's now, with ailing health... and have noticed that I seem to be not the only miniaturists who has deserted the blogosphere and disappeared with barely a trace.
Is miniature-making not a popular hobby any longer?
Are people falling out of love with dolls houses?
Or are many of them, like me, just getting too old and infirm?
Oh, I hope not!
I never really gave up miniature making - though I certainly couldn't turn my hand to 1:24th scale now - and not much possibility of me making clay figures either. I have had a dolls house since posting last - but it ended up being unfinished, unloved... and then broken and dumped.
I still have the gypsy caravan model my husband bought me - still not put together, still in bits...
and now I have another dolls house - a child's one that I picked up for just £19.
This new- found interest in miniature has happened for two reasons...
Firstly, I play a Hidden Object Game (HOG) based upon Agatha Christie's book "The 4.50 From Paddington". I LOVE Agatha Christie books, plays, television series, films... whether its Miss Marple, Poirot,Tommy and Tuppence, Harley Quin or any other character and tale she's magically woven. Anyway... in this HOG there is Miss Marple's living room... and I wanted to recreate it as a room box. I have no idea why this idea planted itself into my head and refused to go away... but it took root and grew and grew. I haven't the room box - but have much of what I need to fill it now. Mostly hand-crafted from scratch, or up-cycled from broken or damaged 1:12th miniatures, I have about 90% of the items I need.
Here's the room I want to recreate:
It won't be exact - but my interpretation of it.
And the second reason? Hubby bought me a Cricut Maker... and although I don't really have a clue how to use it properly, it is allowing me to be able to cut shapes and be accurate - which helps a lot in miniature making :)
Here's a quick snap-shot of some of the items I've made:
Not the grandfather clock - that's an up-cycled project. But the stole, chairs, globes, table, jug, water canteen, basket and contents, hatbox (opening), suitcase (opening), lemon tree and pot, fan, umbrella, radio.... they are all my own creations - from scratch.
Now, I'm not promising regular updates, or a finished dolls house any time soon... but what I can say is that I will be making a few things and trying my best to upload my efforts.

Thursday, 11 February 2016

What A Klutz!

Today I decided it was about time to get my figures ready for putting together... I made them all shoulders, made sure they all had a matching pair of hands and feet with footwear (I hate sculpting shoes - feet are easy, but shoes are a pain! lol), and drilled holes ready for the armature...
And that's where it started to go wrong!
My drill is too tiny, so I borrowed hubby's Dremel to drill the holes I needed as it's bigger than mine. 
Firstly, I misjudged how powerful it was, and when drilling, the little arm flew out of my hand, and with the power of the Dremel behind it, shot across the room somewhere. Half an hour of searching, and I finally retrieved the appendage and started again - holding on a lot more tightly this time.
Next mishap... I was holding tightly to "Come Give Grandma A Kiss", when I felt a terrible burning sensation in my fingers... because I had drilled through the side of the arm, and the drill bit was whirring away, burning my hand! 
Darn - what a Klutz I was being today!
I got out some more clay, and added a bit to Grandma's arms... and was so heavy handed as I was trying to mold the clay, I broke off Grandma's thumb, little finger and ring finger! Out with the Liquid Sculpey, and on to trying to fix poor Grammy's hand. I had to do the two fingers first, and whilst that was in the over re-baking, I decided to clear up a little... and 'cleared up' her thumb. An HOUR later, I managed to relocate the missing thumb under my desk, and reattach it with Liquid Sculpey and baking again. The thumb moved. Somewhere between me placing the limb gently in the oven, and getting it out 10 minutes later, the thumb had turned... so now Grammy has severe arthritis in her left hand with her disjointed thumb.
What a palaver!


On the plus side... Grammy has a lovely little pair of lower legs with pink slippers...
Lets hope I can put her together without doing any more damage!

I have to add this... Hopefully Ms Lizzie will put a photograph of her Fred onto her blog soon.
She came for a visit on Sunday, sat down with a lump of clay, and made 'Fred' - her first figurine sculpture, and he is amazing! She's a natural :)
For myself... well, I have had such a lot of fun making Grammy, that I shall probably make a few more to sell - all different and unique - because I don't use molds :)

Sunday, 7 February 2016

Slowly Does It...

I have been taking my time - re-learning how to make dolls house dolls using polymer clay. I kind of have my own way of making them - a mixture of a LOT of watching how other people sculpt, and then trying out different techniques until I was happy with what I could do.
I am no expert. I have a habit of starting out with a bit of clay, deciding what I want to do... and then abandoning all thoughts of what I want as the clay seems to have a mind of it's own, and I just end up with whatever happens to be made in front of me lol
I make my own eyes for the dolls - once again, a technique that's been a LOT of trial and error (mostly error!). I don't gloss the eyes until the last of the baking has been done - I use oven-dry clay usually - so they may look a bit dull until they're finished. A quick peek at the heads so far...
Jacob Marley (the ghost), and a figurine that I call "Come give Grandma a kiss"...
 I make the front of the heads first, as I find this much easier - mainly because I am quite heavy handed and tend to squash things out of shape if I have to hold them AND sculpt them :)
A 'head in progress' is my next 'doll'... he's going to be a man smoking a cigarette...
 The cigarette is remove-able at the moment - I'll glue it into place when he is otherwise completely finished, as I need to shorten is slightly at the filter end, and also to make sure it doesn't break :)
 I am also making a little cat from leftover clay - an experiment. He is sculpted now... but only got fur on his legs at the moment. I decided that to make the faces, I really needed to clear away ALL bits of mohair. The hair gets EVERYWHERE! I even find I am sneezing it out several days after using it!
I have had a bit of a break from crafting... I had quite a stunning allergic reaction to some medication I had been prescribed - it started with my lip, and then my whole face swelled - it was so funny! Of course, in the last two pictures, you will have to excuse my awful nails that need redoing... and my awful 'selfie' with no make-up and not even my hair done! Had to show the photo though - I am rocking those Jagger-lips :)

Wednesday, 27 January 2016

Amazing Etsy Shop

Well, I was having a poke around Etsy earlier, when I came across the most wonderful little shop.
 The items Diane sells are mostly handmade, - some beautiful pieces of made-to-order furniture.. and the best part? Her prices are so inexpensive, you can go on a serious mini-shopping spree without breaking the bank :)
I just had to share this... please, if you're a miniature collector, go see Diane's shop - you won't regret it :)
Here's s few of her amazing items:
Shop Here

Shop Here

Shop Here

Shop Here

Shop Here

Friday, 22 January 2016

Update

Well, I have tried my hand, once again, at making a 1:12 scale dolls house doll. It's been several years since I made my last one, and since that time, I have aged somewhat. My eyesight has dimmed and my fingers are a lot less nimble... the result is far from fetching, I am afraid. I am trying (trying being the operative word here) to create a figure for the 'Woman In Black' Study room... the proportions are off - I think the head is too big. BUT that's not the only problem... The figure has been made with a mix of nightglow, white, and pale skin tone Fimo clay. For a ghost, the pallor of her skin is perfect... but the way she has been sculpted (I used the term VERY loosely here) and then painted, makes her look as though she's an alien who has gone mad in a Goth's wardrobe...
I can only hope that she looks better when dressed and hidden under a black veil. This sculpting malarkey is so much more difficult than I recall.
When she's finished, I will post a photo - nomatter how bad it is... along with Miss Havisham - who has been waiting YEARS to be dressed - Oh, The Shame! lol
At least I can say I have tried.

Thursday, 14 January 2016

Copper Boiler

I decided to make a copper-boiler for the scullery - this was basically a pot (not often copper, because it was too expensive - but wrought iron instead) set into a concrete top set on a brick surround, with a fire underneath to heat the water. The water was usually ladled in - and when not needed, ladled out again. This copper boiler was used, obviously, for hot water - but also to cook in (boil and steam), and clean items in (including laundry). There was an 'air space' under the fire grate to allow the heat to circulate, and it was covered with a barrel-top (a circle of wood slats).
In a dairy larder/scullery, the copper boiler was used to heat the milk in when making cheese. Just a little bit of useless information there :)
I started of my boiler with 3 pieces of cardboard and a cut-up egg carton...
I smooched a bit of Liquid Sculpey over the basic carcass when it was built and then cut out some rectangles from Fimo clay. I actually made these rectangles - the 'bricks' - too large, and if I did another, I'd make these bricks a lot smaller. The Liquid Sculpey allowed the bricks to stick to the cardboard. I rolled out a thinner piece to sit over the top and shaped it into the rim of the bowl.
I took a risk making a cardboard carcass, but thought that as Fimo baked at such a low temperature, the cardboard wouldn't have time to burn. The wood glue I used in some of the carcass-making did brown - the paper glue (Scotch Quick Dry) didn't discolour at all.
After baking, I let it cool and then painted it with acrylic paints. After talking to Ms Lizzie, it was decided that whitewashed bricks would be more suitable than red brick.
I daubed the paint on because I'd rather have this effect than try and make everything look absolutely smooth and perfect - because it never does look perfect! The 'insides' of the boiler look a total mess - but nobody will see those when the boiler is installed into the scullery.
I was going to use black paint for the bowl, but changed my mind and used copper - well, it's brass coloured actually, because I didn't have any copper paint.
A small door knob and a hook-and-eye simple latch, and it's all ready - except the copper paint is so thick it will probably take a week to dry lol I have made the wooden top also - but I think it needs... 'tweaking' - so I'll photograph that later.
 I am pleased with how it has turned out - it looks just as good as the bought ones that cost at least £40 - and mine was made up with stuff I already had - and some Fimo oven dry clay that possibly cost less than £3.50.
I will probably do a little more painting, and I have a battery operated red glow light (£3) that I can hide inside the fire grate :)
Okay, so it took me a day to build and make - but still not a bad addition to my dolls house scullery, I think :)


Wednesday, 13 January 2016

Working On The Scullery...

Well, I have decided that the fireplace is just a no-no. It looks awful! lol
Instead, I have made a plate rack for the scullery - and although a bit rough, it should look okay. It has a little shelf at the top, 2 plate rack shelves, and little knobs for hanging cups at the bottom.
I have mentioned my friend Ms Lizzie every now and then - and I'm happy to say that she has now created a blog to record her travels into the miniature world - her dolls house (a Christmas gift from her children) is HUGE! A bit daunting for many a beginner, I suspect - but not our Ms Lizzie who has entered the foray with gusto and, it has to be said, a good amount of talent also :)
You can find her blog here:
We are helping each other along - because I am still very much a novice and beginner at this hobby. We have found that we are buying the same sort of things, and thinking about using them in different ways :)
Well, That's all from me today - I haven't forgotten the Yellow Wallpaper Room - just haven't photographed it's progress yet... I'll get there eventually :)
I now have to go and spray some metal 'Faberge' egg stands gold - because the silver just won't do at all!


Monday, 11 January 2016

Just Toddling On...

It seems to me that the most fun I have at the moment with miniatures, is when I am destroying or wrecking something.
The yellow wallpaper room is suitably ruined, and I had sprayed a little fireplace so many times, I'm surprised it's not twice its original size. I actually lacquered the fireplace and the topper I made before the previous paint layers had dried - so now I have a faux-marble fireplace with a lot of 'crackle effect'. Ah, well... never mind :)
I happened across a wonderful blog not very long ago, and have become enthralled by the writers amazing talent. Giac (that's his name) is making a late-Victorian English manor doll house - from scratch. Though I know I'll never match his talents, he has become a real inspiration. Please, if you have time, visit his blog and be prepared to be floored!

As for my own little dolls house - NOT made from scratch (oh, how I wish I had the tools, time and talent to do so!) - is coming along slowly. I made a few foolish mistakes with the kitchen walls and floors. As previously shown, I had made the floors for the kitchen and scullery after deciding where the partition wall would stand. Yesterday, I decided to place the partition wall back into place and fix it permanently. I moved it over about an inch than I had previously decided as I thought it looked better, and hammered in some nails. It was only then that I realised with a full face-palm, that the floors would no longer fit. The scullery floor was too big and the kitchen floor now too small. No problem... I made the kitchen floor bigger with left over tiles, and the scullery floor I began to cut down little by little - I didn't want to make a mistake. It was only when I had laid the kitchen floor down and went to measure the size of wood I needed to fill the doorway sized gap in the floor, that I noticed a huge space between the wall and floor edge. I had placed the partition wall in crooked. Out came the wall for a straighten up, and then some more fiddling with the floors to get them in as well as possible. In all fairness, it's not all my fault - this dolls house is similar to my real home - not a single right-angle or plumb line in sight! I discovered this when I measured the fireplace topper at the front of the room, and when pushed to the back, it was about half a centimetre too high! 
Next, I decided that I wanted to put back the opening side doors of the basement - kitchen and scullery areas. It was at this point I realised my next mistake. I had not left room for the doors to sit into the opening - so I had to carefully remove about 2 strips of wood from the inside edge of the doors. Then I also discovered that, although I had been very careful to make space for the hinges on the doors themselves, I had covered the scullery-side wall hinge. That then had to be cut and chiselled out. 
It's all done now - and though it is a bit of a mess, at least it's MY mess lol
I'll post some photos soon.

Sunday, 3 January 2016

The Yellow Wallpaper Room

One of the rooms just had to be what I had imagined when I read "The Yellow Wallpaper"  (Charlotte Perkins Gilman)... It is an amazing short story that everyone should read at least once - it always leaves me wondering and asking questions - is John (the husband) purposefully trying to make his wife insane - is he having an affair (perhaps with Mary or Jane?). Is the house haunted? Is Jennie really John's sister - has she other motives for being there other than being housekeeper? It's a wonderfully written piece - creepy and atmospheric, and I am gripped by every word as the writer slowly loses her grip on reality... 

I digress - but please read if you have a spare five minutes :)
I first decided on the flooring - I wanted parquet, but not real wood, as I need to gouge out places and make it look worn and distressed. Before papering the room, I needed to decide where the furniture would be placed - it's important to know, for instance, where the bed will be because the wallpaper is described as quite 'unworn' behind the headboard. I am in the process of taking the bed apart and making it slightly smaller, as I don't want it to dominate the room fully... 
 The honour and job of dominating the room must go to the wallpaper itself - and this is just gloriously hideous. Of course it will be scratched, rubbed, torn and damaged - and there has to be fixtures - 'rings' - placed into the wall also.
 I have tried to photograph a close-up of the wallpaper - it has figures in the pattern - very clever and so easy to tile myself and make it the right size I wanted to.
It is almost going to be a shame to destroy this room with gouges and tearing of the paper ... but I am quite looking for ward to it :)

Kitchen Floor

Tiling for the floor in the kitchen and scullery was going to be mightily expensive. I first decided on using popsicle sticks to make a wood floor - but had to change my mind when our local shops all seemed to have a distinct lack of wooden lolly sticks for sale. As I scrolled through pages and pages of early Victorian kitchen pictures, I noticed that a lot of them did have stone flooring - huge tiles laid quite roughly. I thought about what I had to hand... and turned once again to my trusty grey-board :)
I had some acrylic paints - and so watered them down and gave a grey wash to my grey-board ... but unfortunately used up all my white acrylic paint. Still, I persevered using black, dark blue and a little brown paint colours to mottle the A4 grey-board. After it had dried, I cut the board (it's like thick cardboard - about the same as two layers of cereal packet card) into 1" strips. These strips I Then cut further to make rectangles 1" by 2" - saving the leftover bits and throwing nothing away.
I bound up 20 or so 'tiles' at a time with elastic bands, and then sanded the edges so that they were about the same size - I didn't want to be too precise about it.
 I stacked up the tiles all ready to use...
I made a paper template of the rooms I wanted to lay the floor tiles into - just using cheap printer paper. I then had to decide how I wanted to lay out the tiles. At first, it was going to be staggered in straight lines... but that was just too easy - and a little boring too.
 The tiling was lapped over the edges of the paper - mainly using the off-cuts from when I made the strips of cardboard tiles. I glued the tiling to the paper using a good strong wood glue. When everything was in place, I piled a couple of books on top - followed by anything heavy I had to hand... left over Christmas booze bottles, laptop, spray cans of paint, etc...lol
 After a few hours, I uncovered the flooring sheet, turned it over, and cut away anything that was overlapping the edges of the template paper.
I then dry-fitted the flooring into the dolls house - making sure it was the right size, and that I had no significant gaps.
 All okay - so I then used my favourite product of all time... MODPODGE!
I brushed it on, then stippled over with a cheap brush - keeping tweezers handy to pick off the stray brush hairs that fell off.
 And there we have it! Kitchen and scullery floors all done - now onto the popsicle walls :)


The Alcove... Again

I thought I'd show how the alcove was going to be fitted - it's just dry-fitted until I decide on the decoration for the rest of the room. I am really happy with the fit - and it matches perfectly with the rest of the furniture I had made.
 
The reverse side - creating a false wall so that the study ('Woman In Black' room) can be made slightly larger, using the space under the stairs.
 The little table was a bargain - broken and in need of a bit of mending, it cost just £1. I dirtied it up, roughed it up... and now it's all ready for the decaying wedding cake I have to make.

I used a pearl alcohol ink on the fireplace - I wanted it to look 'cold'. I think I may 'marble' the hearth. I used black alcohol ink to 'paint' in the fireplace itself, then daubed it up the fireplace to look a bit used and sooted.

It's quite difficult to see, but here I have added the ceiling wallpaper - it's embossed which I thought was in keeping with the character of the room. I inked it - a lot! Adding a heavier layer of ink above the fireplace for sooting effects. Unfortunately, a crease appeared in the ceiling paper - but I don't think I mind too much :)
 
 The chair was also a £1 bargain. I sanded it, sprayed it.. and really dirtied up the upholstery to make it look decayed and mouldy. I accidentally dropped glue onto the back fabric whilst putting the chair back together - but that's okay because it just makes it messier is all :)

The frame was found at a local retailers - 3 for £1. I added ink and modpodge to blend it in... and the cat was a 49pence bargain - so cute!

Wednesday, 30 December 2015

The Alcove...

The little alcove shelf is finished. It was going to be an opening door that looked like a shelf of books, but I changed my mind :) I'm not sure what will be put into the arch at the top yet - the shelf is only about one centimetre in depth.

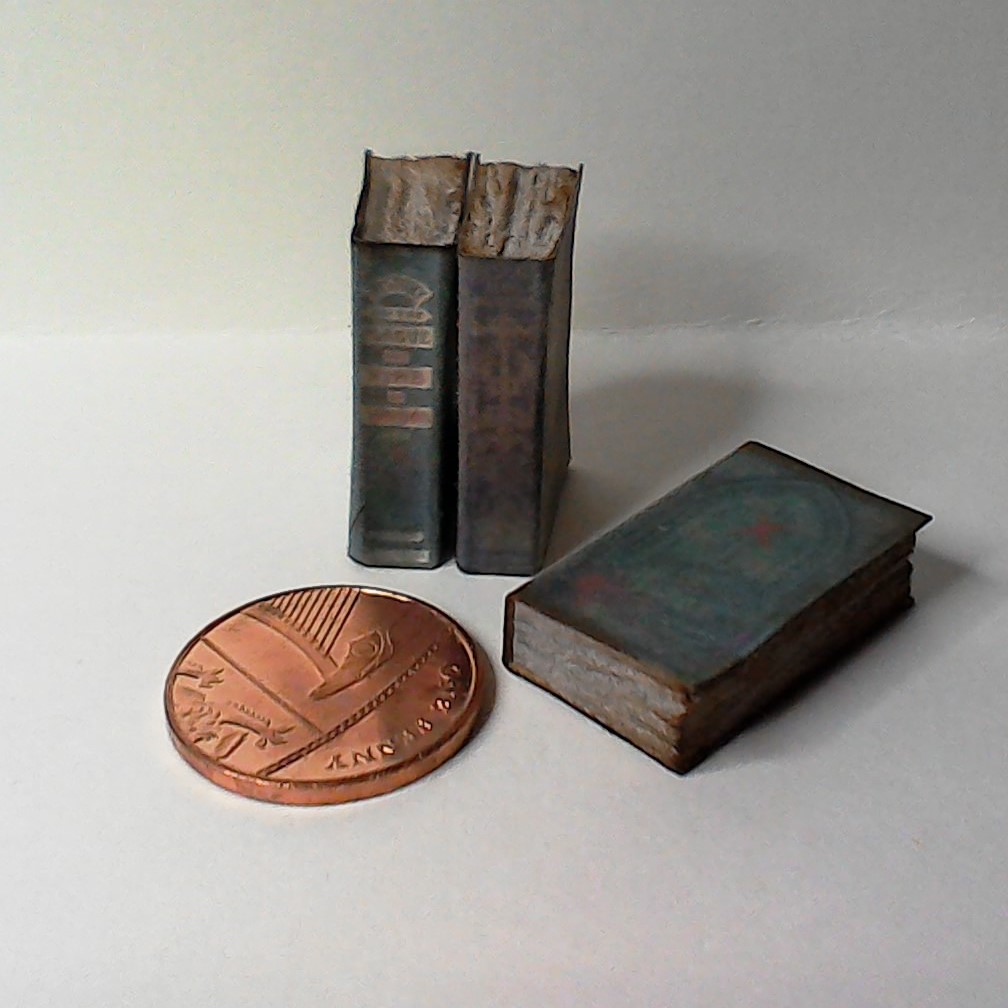
I filled the two middle shelves with books - they can't be opened, and I had to chop them in half to fit the depth of the shelves - but it's only for decoration so I hope it won't look odd or out of place :) There will be skirting covering the bottom, as well as architrave at the top, which is why there are gaps :) It's been crackled, inked, and sanded to match the other furniture I made.
Up close you can really see the over-use of ink lol... and although I do like the effect I have on the shelving, it was achieved by accident because I was too impatient to wait for the paint to fully dry.

After finishing, and not being able to do what I really wanted to do (print flooring and bake clay - I have no ink nor oven lol) I started to look around for something to add to the dolls house. I had printed out a lot of the book covers previously, and had used only a few, so decided to make a few more books - full 1:12th size this time :)
I'm really pleased with how using grey board turned out - it almost looks like real pages :)
I could have painted them white - but decided just to leave them with just a bit of ink to age the 'pages'.

Only another 100 or so more to do then :)

The Best Laid Plans...

There was I, after stripping the dolls house even more (yes, the roof is now fully off, and all things that needed to be chopped are chopped!) and wanting to print out the wallpaper and flooring designs I had managed to get a hold of (or design myself)... when the printer suddenly decided that now is a good time to warn me that it can only print in black, because there is no blue ink left. ARGH!
I am left to pick at doing little things - things I don't really need to do and things I shouldn't be trying in the first place... Like the faux faberge egg standing at 1/2" tall...
This was a practise run. Halfway through moulding the Fimo clay ready for baking, I realised that I don't actually have a working oven until Sunday. I got out my heat gun and blasted that poor wee ball of clay... and blistered it! Still - now I know what NOT to do lol. I just dotted a pearl design all over it and stood it on an upturned crown bead cap. Oh, and  teeny pin head for the top. The next attempt will be smaller and glazed (I hope) with a different pattern :)


Monday, 28 December 2015

Plans...

My head is swimming with plans! I have started de-constructing the dolls house hubby bought me for Christmas - the front is off, the roof is half off, the decor has been ripped out...
Now I have to rip apart the stairs so I can remove part of the wall so that the 'dead space' under the stairs can be used in a room. The tiny spaces for doors at the back of each room will be blocked off - I shall probably make a fake bookcase that opens in one room - and see how I feel about other spaces. A balustrade has to be placed at the top of the stairs - I just don't like that empty space. I will also put on a new basement door and inside the basement, move the dividing wall so that I can have a large kitchen and a small scullery. The front door has had it's step taken off - this will be made smaller so that it looks more appropriate when the front of the dolls house is closed.
Along with the new decor inside, I will decorate the inside of the main front opening - it is currently painted to match the outside of the house.
Next, I plan to remove the pavement area outside and just have the very frontispiece remaining - no gates or anything. The main front steps will be slightly adapted - there's not a lot I can do with them. This leaves me a garden to decorate - and I might have some plans to do a tree stump with little 'gifts' inside - inspired by Boo Radley from To Kill A Mockingbird.
And so to the theme of the dolls house - I have been thinking about other rooms...
So I will have a room based on the study from The Woman In Black, one room that has Jacob Marley's ghost - including chains and heavy boxes I hope. One bedroom I have decided that it absolutely must be the 'nursery' from "The Yellow Wallpaper" - I just adore that short story and have to have it included in my little house. Of course, there will be the Miss Havisham decayed room - the only room that will definitely have a figure inside. All the rooms will be completely separate from each other - really like six room boxes stuck together. I have decided to try and think of something for the stairs so that it is a room in it's own right... at first all I could think of was toys laid forlornly on the stairs- but that's not really eerie enough ... Unless I make the toys quite scary looking? The kitchen may be a Mrs Lovett sort of thing (Sweeney Todd) - but still  not sure on that one either. Something I have to plan, methinks. 
So... some of my favourite writings have all inspired what will happen in my dolls house.
I did feel a little guilty ripping apart someone else's hard work... but I guess I can only hope that it will be an improvement  and so it will be worthwhile.
See how terribly sad it looks right now...?
Wish me luck... and a LOT of patience lol

Ladles!

I saw this somewhere on the internet, but for the life of me couldn't recall where! Still, what a fantastic idea - turning brads into ladles - and quite easy too. I've just ordered in some smaller (4mm) brads to make a tinier sized ladle - a set of two!
Trouble is, they're so easy to make, you end up with  LOT of them :)

Little Jugs

I made all the jugs in a white 'enamel' with navy blue trim - very traditional :) The set I made for my dear friend Lizzie looks more pristine and new - because hers will be a Victorian dolls house, and the jugs/ewers would have been newer back then. The ones I made for myself I wanted to be very dilapidated and rotten looking... so here they are (not a bad attempt for first try)
Lizzie's gift from me - new and pristine looking :)

I wanted my jugs to be grimier and very used looking

This is the only sizes I shall make - the tiny ones are so difficult with my old arthritic hands lol